Transform Your Backyard: A Comprehensive Guide to Building Your Own Patio
Building a patio can seem like a daunting task, especially for homeowners and DIY enthusiasts who may not have extensive construction experience. However, with the right planning, tools, and materials, you can create an attractive outdoor living space that enhances your home’s value and provides a perfect venue for gatherings. The key to a smooth and successful patio project lies in having a detailed checklist that guides you through every step of the process. From selecting the right materials to ensuring proper drainage, this guide aims to equip you with all the necessary information to undertake your weekend patio project with confidence.
One of the most significant challenges in DIY projects is often the fear of making expensive mistakes. This apprehension can be compounded by the confusion surrounding the myriad of choices available in materials, designs, and layouts. By following a structured approach, you can navigate these challenges effectively. This comprehensive guide will help you understand the essential steps involved in planning, building, and maintaining your patio, ensuring that your outdoor space not only looks fantastic but also stands the test of time.
Moreover, a well-built patio can significantly enhance your outdoor experience. Whether you envision a space for summer barbecues, family gatherings, or simply a tranquil spot to unwind, the right patio can transform your backyard into an oasis. By methodically addressing each aspect of your project, you can minimize stress and maximize enjoyment. Let’s dive into the first crucial steps of your patio-building adventure, which will set the groundwork for a successful weekend of DIY work.
DIY patio buildingPlanning Your Patio: The Foundation of Your Project
The first step in building your patio is to create a solid plan. This involves determining the size and layout of your patio based on the space available and your intended use. Start by measuring the area where you want to build the patio, keeping in mind any existing landscaping features that you may want to incorporate. Using graph paper or patio design software can help you visualize the space and experiment with different configurations.
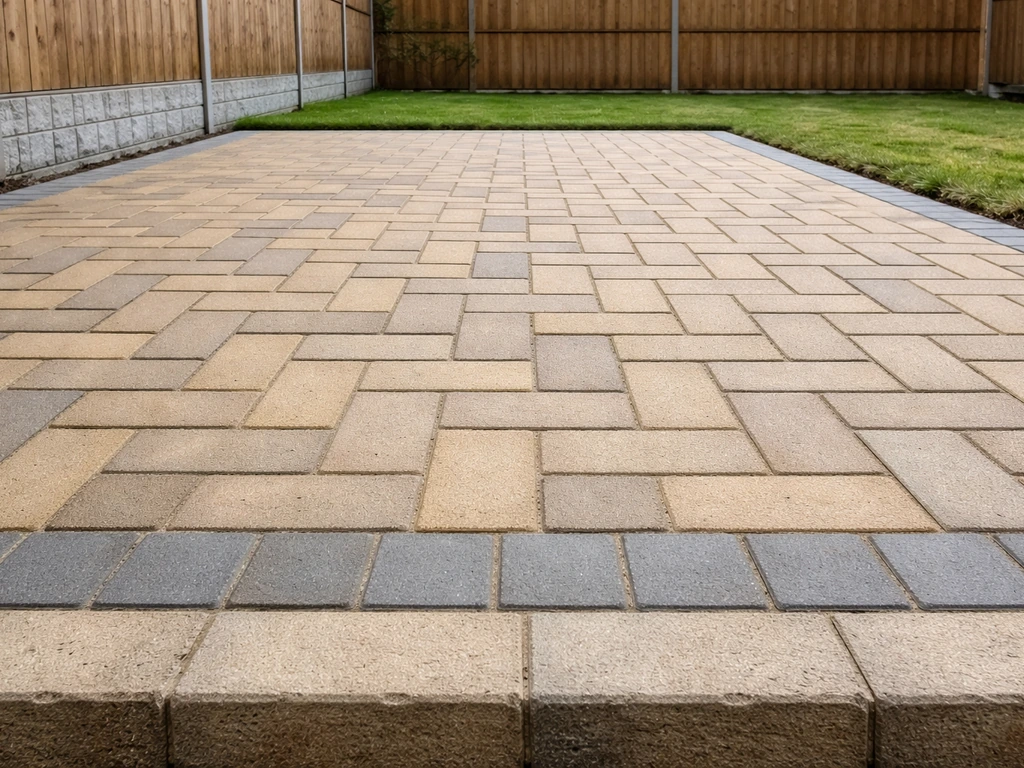
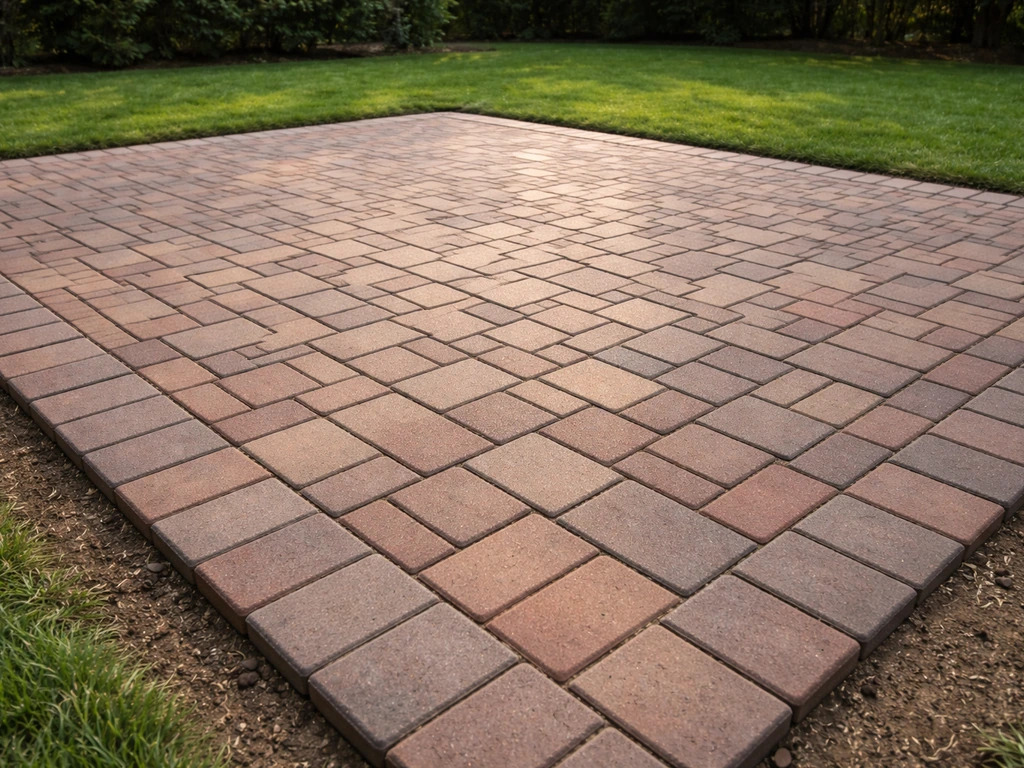
Next, consider the materials that best suit your needs and budget. Common options include concrete, pavers, natural stone, and bricks, each offering unique aesthetics and durability. For instance, concrete is often the most cost-effective option and can be customized with stains or stamps to mimic more expensive materials. On the other hand, pavers and natural stone can provide a more upscale look but typically come with higher price points. patio pavers DIY
Once you have a rough idea of the size and materials, it’s time to check local building codes and zoning regulations. Some areas may require permits for patio construction or have restrictions on the types of materials you can use. By ensuring compliance with these regulations early in the planning process, you can avoid potential setbacks that could delay your project.
Considerations for Choosing Your Materials
When it comes to selecting materials, consider both durability and aesthetics. For example, if you live in an area with harsh winters, you may want to choose materials that can withstand freezing temperatures without cracking. Additionally, think about how the material will complement your home’s architecture and landscaping. Concrete can be poured into various shapes and patterns, while pavers offer versatility in design but require proper installation to prevent shifting over time.
Another factor to consider is maintenance. Some materials, like wood, require regular sealing and treatment to prevent rot and damage. Conversely, concrete and stone are generally low-maintenance, making them ideal for those who prefer a hands-off approach to outdoor upkeep. Consider your lifestyle and how much time you’re willing to invest in maintaining your patio when making your decision.
Designing for Functionality and Aesthetics
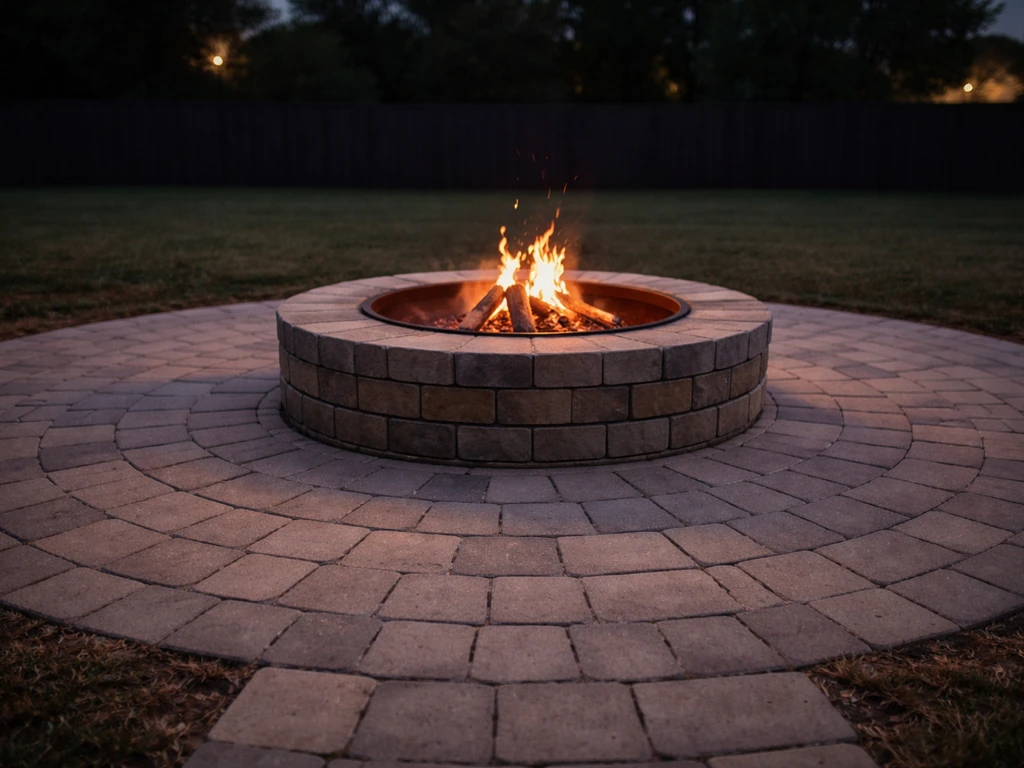
Designing your patio should take into account both functionality and aesthetics. Think about how you plan to use the space; will it be a dining area, a place for lounging, or a combination of both? Make sure to leave adequate space for furniture and pathways, ensuring ease of movement. Additionally, consider adding features such as built-in seating, fire pits, or planters to enhance the functionality of your patio. concrete patio guide
Aesthetically, you can unify your patio design with the rest of your yard by incorporating similar colors and materials. Use landscaping elements like flowers or shrubs to soften edges and create a welcoming atmosphere. Remember, your patio should feel like an extension of your home, so don’t hesitate to get creative with your design!
Gathering Tools and Materials for Your Build
Once your plan is in place, it’s time to gather the necessary tools and materials for your patio build. A comprehensive checklist can help ensure that you have everything you need to avoid interruptions once you start working. Common tools required for patio construction include a shovel, level, tamper, rubber mallet, and a saw if you’re working with pavers or bricks.
In addition to tools, you will need materials such as gravel for drainage, sand for leveling, and the chosen surface material (concrete, pavers, etc.). If you’re using pavers or bricks, make sure to purchase extra to account for cuts and potential breakage. It’s also wise to invest in safety gear such as gloves and goggles to protect yourself during the construction process.
Essential Tools for Your DIY Patio Project
Having the right tools on hand can make a significant difference in the efficiency and quality of your work. A shovel is essential for digging and moving soil, while a level ensures that your patio surface is even. A tamper helps compact the base material, providing a solid foundation for your patio. If you’re working with pavers, a rubber mallet will help you set them without damaging the surface.
For those who are less experienced in DIY projects, consider borrowing tools from friends or renting them from a local hardware store. This can save you money and space in your garage. Make sure you understand how to use each tool before starting, as improper use can lead to accidents or poor-quality work.
Materials You Will Need for Your Patio
In terms of materials, start with the basics: a gravel base is crucial for drainage and stability. On top of that, you will need sand to level the surface for your chosen patio material. If you opt for concrete, you will need the concrete mix and possibly reinforcement materials like rebar. For pavers or bricks, make sure to have a sufficient quantity based on your design plan.
It’s helpful to make a detailed shopping list before heading to the store. This can prevent unnecessary trips back and forth, allowing you to stay focused on the project. Additionally, purchasing materials in bulk can often lead to discounts, so inquire about bulk pricing options at local suppliers.
Executing the Patio Build: Step-by-Step Instructions
With your plan finalized and materials gathered, you can now begin the patio construction process. Start by marking the outline of your patio on the ground using stakes and string, which will serve as a guide for your excavation. After marking, use a shovel to remove the grass and topsoil within the outlined area, digging to a depth of about 4-6 inches, depending on your chosen materials.
After excavation, you’ll need to create a proper base. Begin by laying down a layer of gravel to facilitate drainage, followed by a layer of sand to provide a stable surface. Use a tamper to compact each layer thoroughly. This step is crucial, as a well-compacted base will prevent settling and shifting over time.
Once your base is ready, you can start laying your chosen patio material. If you’re using pavers, start from one corner and work your way across, ensuring that each piece is level with the others. Use a rubber mallet to adjust the pavers as needed. For concrete, mix according to the packaging instructions and pour evenly across the prepared base. Smooth it out with a trowel, ensuring an even surface.
Ensuring Proper Drainage
One of the most crucial aspects of patio construction is ensuring proper drainage. A poorly drained patio can lead to water pooling and damage over time. To create adequate drainage, your base should slope away from your home and towards a designated drainage area. This slope should be about 1 inch for every 8 feet of patio.
Consider incorporating drainage channels or using permeable materials that allow water to pass through. This can help manage excess water and prevent erosion around your patio. If you live in an area with heavy rainfall, you may want to consult with a professional on the best drainage solutions for your specific situation.
Finishing Touches: Edging and Sealing
Once your patio is laid out, it’s time to add the finishing touches. Installing edging around your patio can help keep the materials in place and define the space. This can be done using bricks, stones, or even metal edging. Edging not only enhances the appearance but also prevents grass and weeds from encroaching onto your patio.
After the patio is complete, especially if you used concrete, consider applying a sealant to protect the surface from stains and weather damage. Sealants create a barrier that helps prevent moisture from penetrating, which can lead to cracks over time. Follow the manufacturer’s instructions for the best results, and be sure to allow sufficient drying time before using your new patio.
Maintaining Your Patio for Longevity
Once you’ve completed your patio, the work doesn’t stop there. Regular maintenance is essential to keep your outdoor space looking great for years to come. For paver patios, periodically check for shifting stones and replace any that are damaged. Sweeping away debris and cleaning with a mild soap solution can help prevent stains and discoloration.
If you have a concrete patio, it’s important to keep it sealed and clean. Regularly inspect the surface for cracks and apply a concrete patch if necessary. Additionally, consider reapplying sealant every few years to maintain its protective barrier. This simple maintenance can help extend the life of your patio significantly.
Seasonal Maintenance Tips
Seasonal maintenance is crucial to ensuring the longevity of your patio. In the spring, clean the space thoroughly, removing any debris accumulated during winter. This is also the perfect time to check for any damage that may have occurred during the colder months. In the fall, it’s wise to clear away leaves and other organic matter that can stain or damage the surface.
During heavy rainfall or snow, ensure that drainage channels remain clear to prevent water buildup. If you live in an area that experiences freeze-thaw cycles, be vigilant about repairing any cracks that may develop. Addressing these issues promptly will save you from more extensive repairs down the line.
Enhancing Your Outdoor Space with Accessories
To further enhance your patio experience, consider adding outdoor furniture, lighting, and decor. Comfortable seating, dining sets, and hammocks can transform your patio into a cozy retreat. Additionally, outdoor lighting can add ambiance and extend the usability of the space into the evening hours. String lights, lanterns, and solar-powered lamps can all create a warm and inviting atmosphere.
Incorporating plants and landscaping features can also add beauty and texture to your patio. Potted plants, raised garden beds, and decorative planters can complement your outdoor space and provide a vibrant touch. Consider creating a theme that ties together your patio design with the surrounding landscape for a cohesive look.
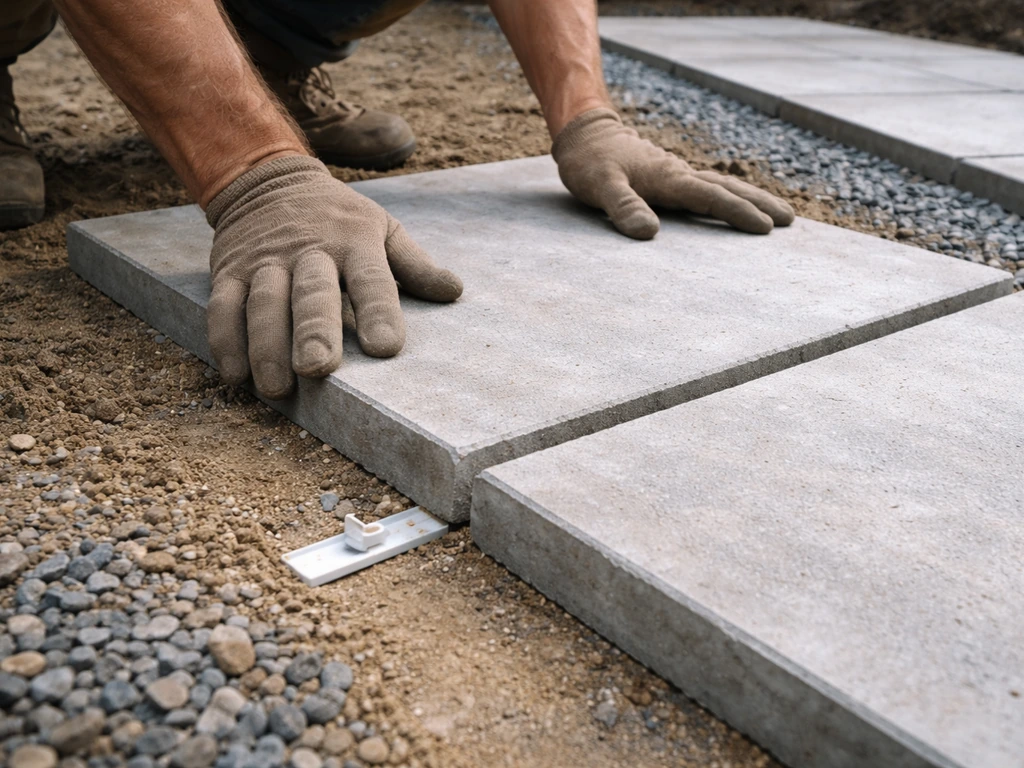
Table of Essential Tools and Materials
| Tool/Material | Purpose | Notes |
|---|---|---|
| Shovel | Excavation and moving soil | Ensure it’s sturdy and appropriate for the soil type |
| Tamper | Compacting base layers | Manual or mechanical options available |
| Level | Ensuring even surfaces | Use a long level for larger areas |
| Gravel | Base layer for drainage | Use clean, crushed gravel |
| Sand | Leveling surface for pavers | Use fine-grained sand for better compaction |
| Pavers/Concrete | Surface material | Choose based on aesthetic preference and budget |
This table outlines essential tools and materials needed for your patio project. Each item plays a critical role in ensuring the success of your build. Make sure to gather everything on this list before you begin, which will help streamline your process and prevent unnecessary delays.
Pros and Cons
- Pros:
- Cost-Effective: Building your own patio can save you money on labor costs, allowing you to invest more in quality materials.
- Customization: DIY projects allow you to design your patio exactly how you envision it, tailoring it to your specific needs and style.
- Skill Development: Undertaking a patio project enhances your DIY skills and gives you a sense of accomplishment upon completion.
- Increased Home Value: A well-built patio can increase the overall value of your home, making it more attractive to potential buyers.
- Cons:
- Time-Consuming: DIY patio construction can take significant time, especially for those who may not have prior experience.
- Physical Labor: The project requires physical effort, which may be challenging for some individuals.
- Potential for Mistakes: Without experience, there is a risk of making costly mistakes that can be difficult to rectify.
Weighing the pros and cons of a DIY patio project is essential for making an informed decision. While the benefits of cost savings, customization, and skill development are compelling, potential drawbacks such as time commitment and the risk of errors should also be considered. Ultimately, careful planning and preparation can help mitigate these risks, making your patio-building experience enjoyable and rewarding.
Frequently Asked Questions
- What is the best material for a DIY patio?
The best material depends on your budget, style, and climate. Concrete is affordable and versatile, while pavers offer a more upscale look. Natural stone is beautiful but can be more expensive. Consider your maintenance preferences and local weather conditions when choosing.
- How long does it take to build a patio?
The time required to build a patio varies based on the size and complexity of the design. A simple DIY project can take a weekend, while more extensive installations may take several days or even weeks. Planning ahead and organizing your materials can help speed up the process.
- Do I need a permit to build a patio?
Whether you need a permit depends on local regulations and the size of the patio. It’s essential to check with your city or county building department to ensure compliance with any zoning laws or guidelines. Failing to obtain necessary permits can lead to fines or required removal of the patio.
- How do I maintain my patio?
Regular maintenance includes cleaning, sealing, and inspecting for damage. Sweep away debris and clean stains promptly to prevent long-term damage. For pavers, check for shifting stones, while concrete should be sealed every few years to maintain its integrity.
- Can I install a patio on uneven ground?
While it's possible to build a patio on uneven ground, it requires additional preparation. You may need to level the area or build retaining walls to create a stable base. Consult with a professional if you are unsure about how to properly prepare the site.
Conclusion
Building your own patio can be a fulfilling project that transforms your backyard into a functional and beautiful outdoor space. By following a structured approach, from careful planning and material selection to execution and maintenance, you can create a patio that meets your needs and enhances your home’s appeal. Remember to take your time, adhere to safety standards, and enjoy the process. With the right preparation and execution, your DIY patio can become a cherished space for relaxation and entertainment for years to come. Embrace the challenge, and take pride in your accomplishment as you watch your vision come to life!
